Laser Cutting Advanced Tutorial 05 - Ingenious Use of Focal Length
Last week, we learned that different focal lengths have different effects on the cutting effect by cutting small pieces of wood, and we know that 6mm is the best cutting focal length. In addition, we have found that the width of the slit becomes wider as the focal length becomes larger.
This issue: Laser Cutting Advanced Tutorial 05 - Ingenious Use of Focal Length
List of items:
Laser cutter: Nova 35 (80W)
Glued wood board: 3mm
parameter settings:
Cutting speed: 20mm/s
Cutting power: 25%
Cutting focal length: 6mm, 15mm, 18mm
Whether to blow: weak blowing
Comparison of effects:
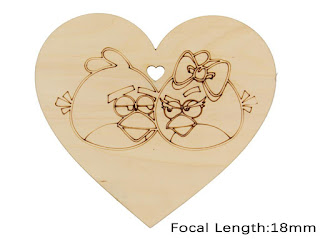
We can compare the two samples, one is at a focal length of 6mm, and the other is at a focal length of 15mm.
It can be seen that the 6mm focal length is very thin because of the slit, and it is necessary to ensure that the pattern is not cut through, and the power cannot be set too high, resulting in a pattern that is not obvious enough and lacks a sense of line.
On the contrary, the shape we cut with the focal length of 18mm is much better. The difference between the two effects is that we skillfully use the width of the slit and the depth of the cut to change with the change of the focal length. When the focal length becomes larger, the spot becomes larger, the width of the slit becomes larger, and the focused energy becomes weaker as the focus becomes larger, and the cutting depth becomes shallower.
in conclusion:
From the above test results we can see that not all cases use the best focal length will get the best results, we must learn to vary from situation to situation, skillfully use the characteristics of the focal length to create more special product. In addition, we can also use this feature to make the effect of "engraving" the brush on the board.
Useful links: Laser cutter reviews


Comments
Post a Comment